+971 50 634 3878 Sharjah, Dubai info@lifeguarddatarecovery.com
recover crashed hard drive
A hard drive crash can feel like an immediate crisis especially when family photos, critical work documents, or financial records are trapped on the unreadable disk. However, discovering that your drive has crashed does not automatically mean your data is lost forever. Lifeguard Data Recovery
In this comprehensive guide, you will learn how to safely diagnose your storage drive, determine whether your device has suffered software corruption or hardware damage, perform safe DIY data extraction using byte-level disk clones, and know precisely when to hand the drive over to cleanroom data recovery specialists. recover crashed hard drive
Emergency First Steps: Stop What You Are Doing (Golden Rules of Data Safety)
Before running tools or pressing keys, follow these rules to preserve your data. Taking the wrong action during the initial moments of drive failure is the single most common reason partially recoverable drives become permanently damaged LifeGuard Data Recovery
Unplug the drive immediately if you hear mechanical noise. If your internal or external hard drive is clicking, grinding, scraping, or high-pitch squealing, disconnect power immediately. Mechanical noises indicate physical contact between the read/write heads and the delicate magnetic platters. Every second the drive spins, it can physically scrape away the magnetic coating containing your data.
Never install recovery software onto the crashed drive. If your operating system is running off the drive that crashed, do not download or install data recovery software onto it. Installing new software writes new files to the storage drive, directly overwriting the deleted or corrupted files you are trying to recover.
Avoid running or disk repair utilities on failing hardware. Command-line repair tools like Windows or macOS Disk Utility First Aid write changes to the disk structure. On a drive experiencing hardware degradation, running intensive disk fixes subjects the drive to extreme stress, causing bad sectors to spread rapidly or prompting complete mechanical collapse.
Do not attempt physical “internet hacks.” Internet myths such as freezing your hard drive, tapping it with a screwdriver, or opening the outer chassis outside a certified cleanroom will destroy your drive. Modern hard drives operate with tolerances smaller than a single particle of dust; exposing platters to ambient room air guarantees permanent data destruction.
Understanding Hard Drive Crashes: Logical vs. Physical Failures
Not all hard drive crashes are the same. Hard drive failures fall into two distinct categories: Logical Failures (software-based) and Physical Failures (hardware-based). Identifying which failure type you are dealing with determines whether you can use DIY software or need professional lab intervention.
Logical Crashes (File System Corruption & Software Errors)
A logical crash occurs when the hard drive’s physical components (motors, heads, magnetic platters) remain operational, but the computer can no longer read or navigate the file structure correctly.
Causes: Unexpected power outages, forced shutdowns, virus/malware infections, accidental partition deletion, corrupted boot sectors (MBR/GPT), or corrupted file systems (e.g., converting to RAW status).
DIY Feasibility: High. Because the drive mechanical hardware is safe, software tools can reconstruct missing file structures and extract data.
Physical Crashes (Mechanical & Hardware Failure)
A physical crash occurs when one or more internal mechanical or electronic components physically fail.
Causes: Physical drops or impacts, electrical surges burning the Printed Circuit Board (PCB), worn-out spindle motors, or head crashes (where the read/write arm collides with the platter surface).
DIY Feasibility: None. DIY software cannot fix broken hardware. Physical failures require physical donor parts and precision disassembly inside a ISO-certified cleanroom environment.
Top Symptoms of a Failed or Damaged Hard Drive
Audible Warning Signs (Clicking, Grinding, or Beeping Noises)
The “Click of Death”: A rhythmic, repeating clicking sound indicates that the read/write heads are attempting to initialize, failing to read the platter alignment tracks, resetting to their home position, and repeating the cycle.
Grinding or Scraping: High-pitched metallic scraping means the read heads are making contact with the spinning platters. Unplug the device immediately.
Beeping Sounds: A faint, repeating electronic beep usually indicates that the spindle motor is stuck because the read/write heads failed to park properly and are clamped flat onto the stationary platters (head stiction).
System & File Level Symptoms (RAW Disk, Missing Boot Drive, Slow Read Speeds)
File System Shown as RAW: Windows File Explorer prompts you with “You need to format the disk in drive X: before you can use it.” Disk Management lists the partition as RAW instead of NTFS, FAT32, or exFAT.
Extremely Slow Operating System Performance: Attempting to open a folder on the drive causes Windows File Explorer or macOS Finder to freeze, crash, or load for hours—a sign that the drive controller is stuck in an endless read-retry loop over decaying bad sectors.
S.M.A.R.T. Warning Screen: During system boot, BIOS/UEFI halts the startup sequence with a message such as “S.M.A.R.T. Status Bad, Backup and Replace.”
Triage Decision Matrix: DIY Software vs. Professional Lab Recovery
Use this decision matrix to safely determine your next steps before attempting data recovery:
Creating a Byte-Level Disk Image (Safe DIY Recovery)
If your drive has logical corruption or mild bad sectors, do not run data recovery software directly on the live physical drive. Recovery scans subject storage drives to heavy, continuous read cycles that can trigger total failure midway through scanning. Instead, make a byte-level image (an exact bit-for-bit clone of the drive) and run your recovery software on that image file.
Generate the Byte-Level Clone Image
Download a disk imaging tool capable of pass-through cloning (such as OSForensics, FTK Imager, or DDRescue for Linux/macOS).
Select your damaged hard drive as the Source Drive.
Select your healthy secondary drive as the Target Destination (saving as a raw file).
Enable Reverse Pass / Skip Bad Sectors settings if supported. This tells the cloner to jump over bad sectors immediately, grab all healthy data first, and return to attempt damaged sectors at the very end.
Once the imaging process finishes, safely disconnect the physical damaged hard drive. Perform all subsequent software recovery steps using the created image file.
How to Recover Data from a Crashed Hard Drive Using Software
Once you have safely mounted your byte-level image file (or if you are working with a stable drive suffering only from accidental deletion or partition loss), follow these steps to recover your files:
Selecting and Setting Up Safe Data Recovery Software
Select a recognized data recovery tool (such as DMDE, Disk Drill, R-Studio, or PhotoRec). Install the software onto your main operating system drive never onto the target disk containing the lost files.
Running a Deep Scan and Filtering Recoverable Files
Launch the recovery program and choose Load Image / Mount Image File.
Select the byte-level image created in Method 1.
Click Deep Scan (or Detailed Search). The software will bypass the corrupted file system layer, reading the underlying raw sector signatures to rebuild file headers (scanning for , etc.).
Utilize the built-in file search filters to sort discovered files by file extension, original creation date, or health status (e.g., Existing, Deleted, or Corrupted).
Previewing and Exporting Data to an External Destination
Use the software’s File Preview window to view images, text files, or document contents prior to restoration. File previews confirm that the file header remains intact and readable.
Mark the checkboxes next to the folders and files you want to retrieve.
Click Recover / Save Data.
Crucial Rule: Choose a safe destination path on a completely different healthy drive (such as a new external hard drive or cloud storage volume). Never save extracted files back onto the damaged source device.
Recovering Data from Specific Device Types
Recovering Laptop Hard Drives (Removing Drive & USB Enclosures)
When a laptop encounters a system boot error or motherboard damage, the hard drive inside may still be entirely functional.
Extraction: Power down the laptop, disconnect the battery, open the bottom panel, and carefully detach the internal 2.5-inch SATA or NVMe drive.
Docking Connection: Insert the extracted laptop drive into a dedicated SATA-to-USB docking station or external hard drive enclosure adapter.
Connecting to a Working PC: Plug the docking station into a secondary working computer. If the crash was restricted to the laptop’s motherboard or OS installation, the drive will mount as a secondary data volume, allowing you to copy files off directly.
BitLocker / FileVault Decryption: If the laptop drive was encrypted, Windows or macOS will prompt you for the recovery key. Enter your 48-digit Microsoft BitLocker recovery key or Apple FileVault key to unlock the data volume.
Recovering External Hard Drives (Port Issues, Enclosure Swaps & Drivers)
External portable hard drives frequently fail due to broken USB bridge controllers, damaged USB ports, or bent connector pins rather than internal disk failure.
Isolate Cables and Ports: Connect the external drive directly to a rear USB port on your desktop computer’s motherboard rather than front-panel ports or unpowered USB hubs. Swap the USB cable.
Inspect Disk Management / System Information: Press and open Disk Management (Windows) or open Disk Utility (macOS). Check if the physical drive appears with its correct storage capacity, even if it lacks a drive letter. If it appears, assign a new drive letter via right-click options.
Bypass the Enclosure (SATA Enclosure Swap): Standard desktop external drives contain a standard SATA hard drive plugged into a SATA-to-USB bridge controller board inside the outer plastic casing. Carefully pop open the plastic casing, remove the SATA drive from the bridge PCB, and plug the drive directly into a desktop motherboard using an internal SATA data and power cable. (Note: Some modern 2.5-inch portable drives have USB ports soldered directly onto the drive PCB and cannot be bypassed without specialized lab equipment).
Advanced OS Fixes for Non-Booting Drives
If your hard drive is physically healthy (no noises, correct capacity recognized in BIOS/Disk Management) but fails to mount due to minor file structure anomalies, native OS diagnostics can fix basic access issues.
Running First Aid via Disk Utility (macOS)
Restart your Mac and hold down to enter macOS Recovery Mode.
Select Disk Utility from the Utilities window and click Continue.
Click View > Show All Devices.
Select the corrupted hard drive or target volume from the left sidebar.
Click First Aid in the top navigation bar, then click Run. macOS will verify directory structures, volume headers, and catalog files, attempting repairs where necessary.
When to Use a Professional Hard Drive Recovery Service
When hard drives sustain severe mechanical damage, electrical board failure, or internal read head failure, software tools are entirely ineffective. In these scenarios, safe data retrieval requires a professional data recovery laboratory.
What Happens Inside a Class 100 Cleanroom Lab
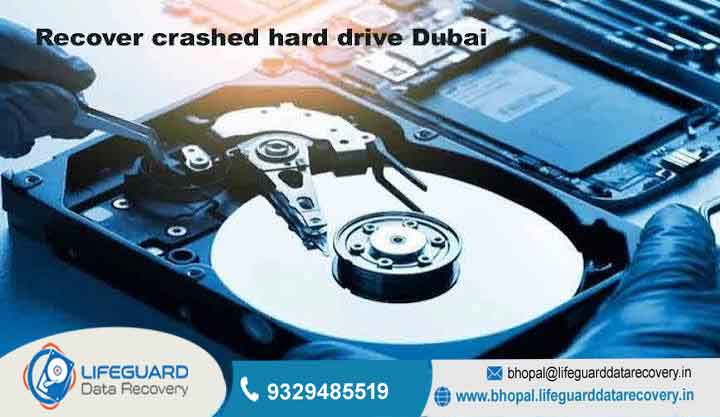
Professional recovery labs utilize ISO 5 Certified Class 100 Cleanrooms. These controlled environments filter airborne contaminants down to less than 100 particles per cubic foot (preventing microscopic dust from settling on spinning drive platters).
Inside the lab, engineers perform delicate hardware procedures:
Head Assembly Replacement: Swapping out broken or bent read/write head assemblies with matching donor parts sourced from identical hard drive models.
Platter Swaps & Spindle Repair: Carefully transferring magnetic storage platters into new chassis shells if spindle motors seize up.
Firmware Reconstruction & PCB Micro-Soldering: Transposing encrypted ROM chips from a burned Printed Circuit Board (PCB) onto matching replacement PCBs
Hard Drive Recovery Cost Breakdown & What to Expect
Data recovery pricing depends on the nature of the failure and physical hardware complexity, rather than the raw gigabyte size of your files.
(Data compiled based on published industry rate cards and service averages).
How to Find a Reliable Data Recovery Lab
Avoid local repair shops that do not own certified cleanrooms and instead outsource jobs while charging extra fees. Evaluate potential labs using the following standards:
Strict Policy Reputable labs provide an upfront diagnostic evaluation. If they cannot recover your target files, you pay nothing for the recovery attempt.
Transparent Diagnostic Reports: The lab should provide a itemized report listing exact drive errors, recoverable file trees, and a binding, fixed-price quote prior to starting work.
Data Privacy & Security Protocols: Ensure the laboratory maintains HIPAA, SOC 2 Type II, or ISO security compliance to protect sensitive personal and corporate data.
How to Prevent Future Hard Drive Crashes and Data Loss
All mechanical hard drives eventually fail due to physical wear and mechanical friction. Protecting your files requires proactive monitoring and storage redundancy.
Implementing the 3-2-1 Backup Strategy
Never rely on a single hard drive or single external disk as your exclusive storage location. Follow the 3-2-1 Backup Rule:
3 Copies of Data: Keep your primary working copy and at least two separate backup copies.
2 Different Storage Media Types: Use two distinct device types (for example: one internal SSD and one external magnetic HDD or NAS drive).
1 Offsite Location: Keep one backup offsite at a secondary location or backed up continuously to an encrypted cloud storage platform.
Monitoring Drive Health with S.M.A.R.T. Attributes
Hard drives utilize built-in self-monitoring technology called S.M.A.R.T. (Self-Monitoring, Analysis, and Reporting Technology). Download free monitoring utilities such as CrystalDiskInfo (Windows) or DriveDx (macOS) to read your drive’s health status.
Pay immediate attention to these critical S.M.A.R.T. attributes:
ID 05: Reallocated Sectors Count: Indicates the number of bad sectors that have failed and been remapped to spare sectors. A steadily rising count indicates physical platter decay.
ID 197 (0xC5): Current Pending Sector Count: Unstable sectors waiting to be re-mapped due to read/write errors.
ID 198 (0xC6): Uncorrectable Sector Count: Sectors that failed read attempts entirely. Even a count of 1 indicates an active risk of data loss.
Frequently Asked Questions (FAQs)
Can you recover data from a dead hard drive that won’t turn on?
Yes. If a hard drive shows no signs of life, does not spin, and has no LED activity, the failure is usually caused by a burned Printed Circuit Board (PCB) or blown TVS protection diodes resulting from a power surge. Cleanroom engineers can repair or replace the damaged PCB and swap firmware EEPROM microchips to restore power and extract the data.
How much does professional hard drive recovery cost?
Professional recovery costs generally range from for logical software recovery, and for severe mechanical failures requiring cleanroom hardware disassembly and donor parts. Exact pricing depends on component damage and labor time rather than total drive storage capacity.
Is it safe to use free hard drive recovery software?
Free software is safe to use only if your drive is physically healthy (no clicking, grinding, or hardware drop history) and you run the scan on an image file rather than the live failing drive. Additionally, verify that free utility downloads are sourced directly from reputable developers to avoid malware risks.
How do I find a trustworthy hard drive recovery service near me?
When looking for local services, choose facilities that operate an verified ISO 5 / Class 100 cleanroom lab, provide a clear “No Data, No Fee” evaluation policy, and offer upfront fixed-price quotations before beginning recovery procedures. Avoid repair shops that do not provide clear diagnostics or offer vague, non-itemized quotes.